A couple of years ago I wrote about video stabilization. Unfortunately, all I could do was write about the technology behind it.
The good people behind Blender[a], however, have managed to turn out a product that everyone can use to stabilize their videos.
1. Theory
Stabilization in Blender consists of two distinct steps:
Figure out how the camera moved in three-dimensional space.
Compensate for it.
This is unlike other stabilizers that may only consider how the two-dimensional video image moves on screen. The basics are the same, though - we track a set of points on the screen, and then perform whatever transformations of the image we must do to move the points to where we want them.
2. Practice
With that in mind, let's go through the steps required to take a clip from the camera to the video editor - from which it can then be rendered.
In this tutorial, we will limit ourselves to a clip that is filmed from a fixed location, with a "fixed" camera that is shaking a bit. For stabilization of clips with a moving camera or a camera that is panning, one must go through a bit more complicated process that I hope to return to in a future tutorial.
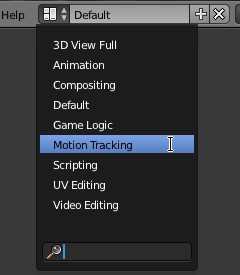
2.1. Tracking
We start by going to the Motion Tracking workspace.
Click on Open to open the video clip you want to stabilize

Then select Tracking in the toolbar.
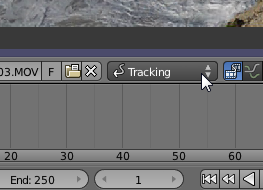
In order to tell the tracker when to stop, find the end of the movie clip and set the number of frames for the scene from this.

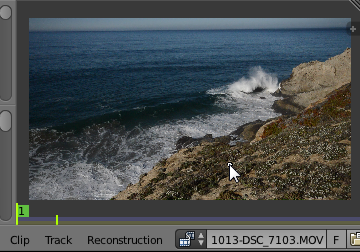
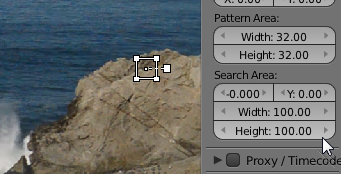
Then it's time to select the track points. Ctrl-left click in the movie to set tracking points. Good tracking points have sharp vertical and horizontal edges and don't change much between frames. I try to pick a point as close to the center of the image as possible, as the image distortion is the least there, and it is more likely that it will stay in view during the entire clip, but sometimes you just have to settle for what is available.
Since we want to stabilize rotation as well as picture shift, we need at least two points. Blender will try to keep the angle from the first to the second point constant, so the farther away the second point is, the better.
Set the tracking point size to something that gives the tracker enough detail to work with.
Then press the right arrow to start tracking.
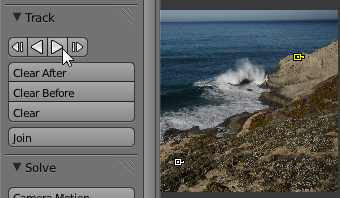
The tracker will start to fill in the tracking data. If all goes well, it will not lose tracking on either point and will just keep going to the end of the clip.
In this case, we'll just assume that everything went well. If not, you have to pick up the lost tracking point at the frame where it was lost with G, move it to the right spot, and press the right arrow to resume tracking.
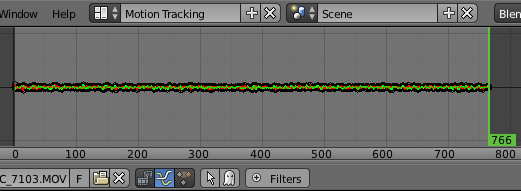
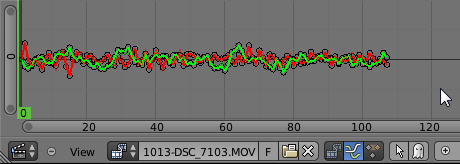
2.2. Computing Camera Motion
Now it's time to figure out what kind of camera motion would result in the tracking points moving as they did. Since I shot this clip standing still, I constrain the solver to Tripod Motion, meaning that it only has to consider camera rotation and not linear movement.
It should be noted that with only two track points, we can't solve for more complex motions: The two track points, each with two parameters - the horizontal and vertical coordinates - can only give us at most four variables for camera motion. Here, we only solve for three (yaw, pitch and roll), and in theory we could solve for one more, but not for two more.
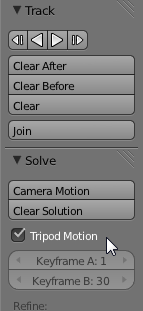
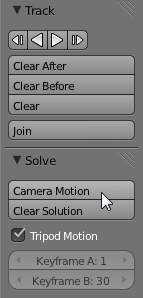
Press the button to start the solver.
2.3. Correcting
Now that we have figured out how the camera moved while I was filming the clip, it's time to do something with this solution. In particular, we will apply the inverse of the camera movement to the clip, which should result in the track points not moving in the frame, and us having a perfectly stable video.
This of it this way: We pick two pixel points in the frame, and for each frame, we move and rotate the frame so that the track points are exactly on these two points.
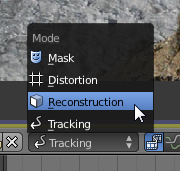
Select Reconstruction.
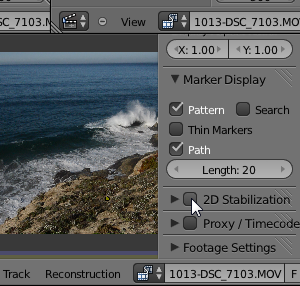
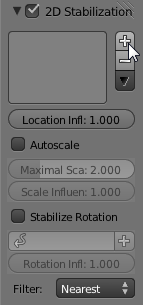
Select 2D stablization.
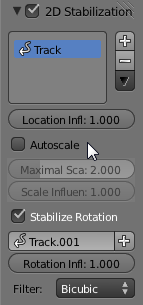
We'll use one tracking point to correct for camera pitch and yaw, and the second to correct for roll. Press the plus button to add tracks.
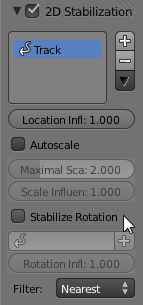
Remove the track we use for rotation.

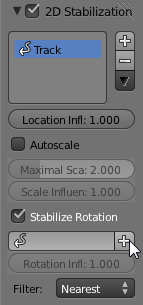
Enable rotation correction.
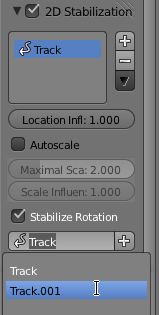
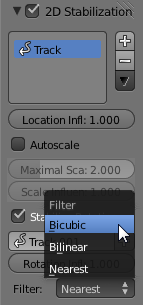
Select the drop-down and add the second track point:
This drop-down controls how the image transform is applied. Since the image will be translated by fractions of a pixel and rotated, we should at least choose linear interpolation. I usually go whole-hog and set it to bicubic.
When we translate and rotate the source clip, some parts of the image may end up outside the frame, and conversely, parts of the frame may end up with no image. In order to keep the frame filled, we can enlarge the clip. In this case, since we are stabilizing a clip that has been shot while standing still, we can just select Auto scale and be done with it.
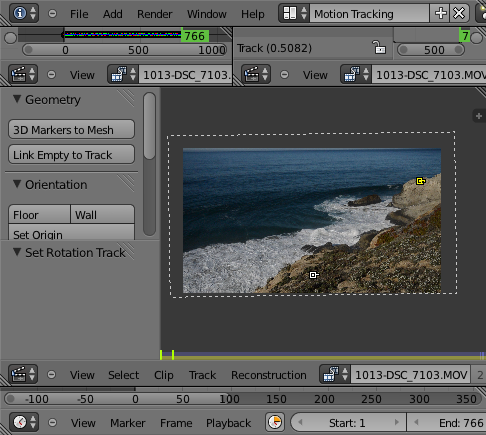
Finally, it's time to see the end result. Check Stable to show the stabilized result.

This is what it looks like. The dotted outline is the original frame, rotated, translated and scaled to keep the track points where we want them while still covering the whole frame.
2.4. Using the Stabilized Clip
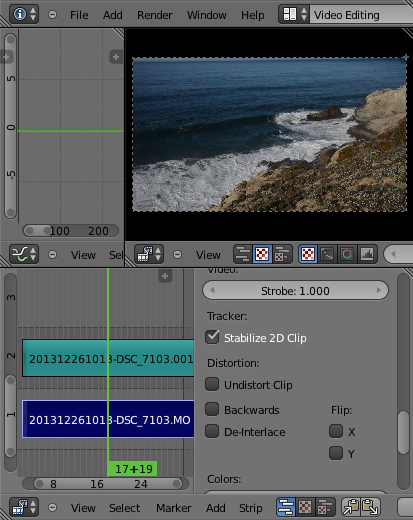
The final step is to use the stabilized clip. Go to Video Editing.

The stabilized clip can be found under Add → Clip....

Find the Stabilize 2D Clip checkbox in the right hand column and select it.

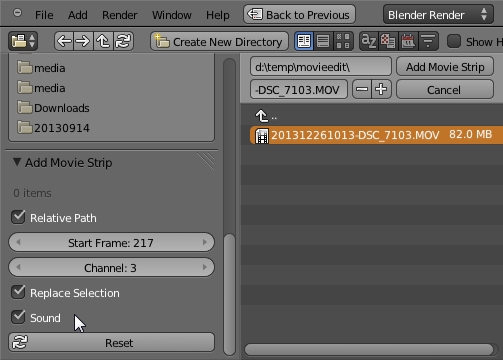
This clip, however, has no audio. For that, we'll have to add it from the original, un-stabilized clip. So we select Add → Movie.
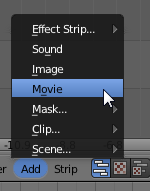
Select the original clip and make sure Sound is selected.
Then we delete the video track, keeping the audio. Align the audio clip with the stabilized video clip, and we're done!
3. Limits
So can you leave the tripod at home, then? No.
As you no doubt have noticed, stabilizing a clip takes time. It reduces the image quality due to the enlargement and the other image transformations that are required.
Furthermore, if your shutter speed is low enough that the camera shakes gives rise to image blurring, this will not be corrected by the stabilization. It will, however, cause the motion tracker to lose tracking and require your intervention to keep going.