Super resolution doesn't work, but panorama stitching does. In order to help me aim the camera and get the most pixels out of the resulting component photos, I created an app that uses the orientation sensor in my phone to assist me.
1. Try It
It's a progressive web app, so you can use it online or install it on your phone by clicking on Add to home screen.
2. Screenshots

3. Usage


-
Attach the phone to the camera. You can use a Puluz PU214[a] as I do above, or any other phone-to-camera fixing device. It doesn't have to be aligned with the optical axis of the camera, but you must set it up so that the phone never points straight up or straight down during the panorama capture process[1].
-
Use a wide-angle lens to frame the resulting panorama.
-
Press the Set button.
-
Switch to the panorama lens.
-
Move the camera, in turn, to each of the panorama points, and take a photo. You can tap the panorama display to add a white rectangle where the camera is pointing if you need to keep track of which shots you have taken and which ones are left.
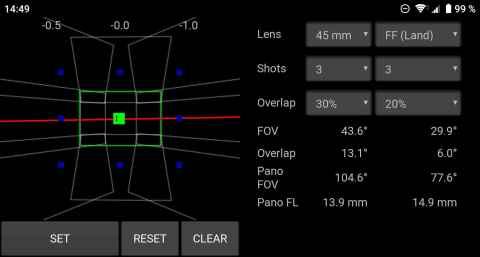
4. Display
The blue dots are the panorama photo positions, and the moving red / green dot is your current aim. The color and size of the moving dot indicates how close to a panorama point you are:
-
Small red: Your aim is off by more than one-fifth of the overlap. You risk stitching errors.
-
Small green: Your aim is off by more than one degree, but less than one-fifth of the overlap. Stitching will probably be fine, but depending on how your aim is off you may not get the full panorama FOV.
-
Large green: Your aim is within one degree. This is more than good enough for most purposes.
5. Settings
-
Lens: This is the lens you will use for the panorama. Use the actual focal length of the lens - if you put a 35mm lens on your crop-sensor camera, select "35mm".
-
Shots: Select the number of shots in the panorama. First number is horizontal, second vertical.
-
Overlap: The overlap between rows and columns in the panorama.
Beneath the settings are four rows that describe the resulting panorama. The first number is the horizontal component and the second the vertical.
-
FOV: This is the computed field of view of the lens and sensor combination you have selected.
-
Overlap: This is the overlap in degrees. You must aim at least this well!
-
Pano FOV: This is the approximate field of view for the resulting panorama.
-
Pano FL: This is the equivalent lens focal length for the panorama. If you are taking super-resolution panoramas, the numbers here should not exceed the focal length of the lens that you used for framing.
6. Results
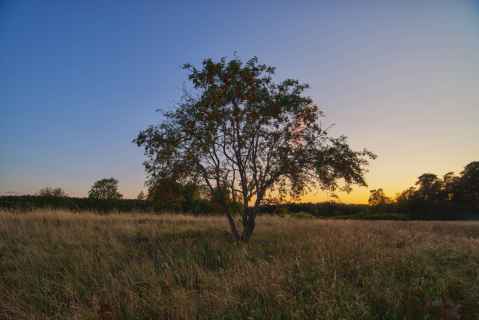
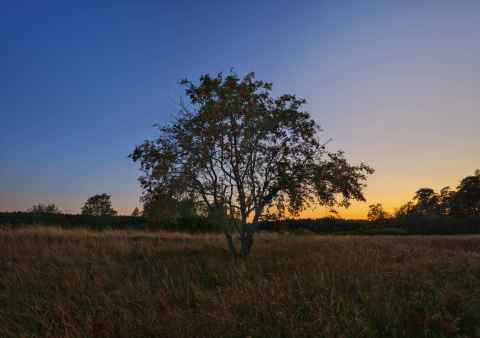
186MP image from 9-position panorama taken with 45mm lens.
2019-09-13 19:06


7. Comments
Getting higher resolution by panorama stitching requires one to keep a couple many things in mind, but the two biggest ones in my experience are (1) that it takes time and (2) that your depth of field shrinks.
7.1. It Takes Time
Swinging your camera through nine positions takes a lot longer than simply taking on exposure. For me it takes about a minute to step through all nine positions in a three by three panorama, which makes for one really bad rolling shutter that you have to compensate for.
If anything moves during that minute you risk visible seams in the resulting image. For the example above, had any of the branches moved in the wind it would have been impossible to stitch the images into a panorama.
By placing the edges of the panorama photos strategically you can minimize this risk, but this can't always be done.
7.2. Depth of Field
The other thing that will be apparent is that your depth of field shrinks as your focal length increases. If you don't consider this when setting up the shot you may end up with a lot of blurry pixels and not much more detail.
The short-short version of this is that to maintain the same sharpness at a constant output size (that is, for the photo to be equally sharp when printing it in 8x10 or some other format), you need to increase the f-number by the increase in focal length. That is, if you go from 15mm to 45mm as you go from framing a shot to capturing the panorama, a 3x increase in focal length, you need to increase your f-number by a factor of three as well. To maintain the same sharpness at 100%, you need to increase the f-number by the square of the increase in focal length. That is, if you go from 15mm to 45mm as you go from framing a shot to capturing the panorama, a 3x increase in focal length, you need to increase your f-number by a factor of nine (three times three). If you go from 15mm to 30mm (2x), it must increase by a factor of four (two times two).
This is quite a subject, so I wrote a whole article about it: Panorama Equivalence