Amplify the Sky
The starry sky is beautiful. But if you, like me, live in a city, then you have two big things between you and a lot of stars: atmospheric haze and light pollution. That's why I edit out a bit of the haze.
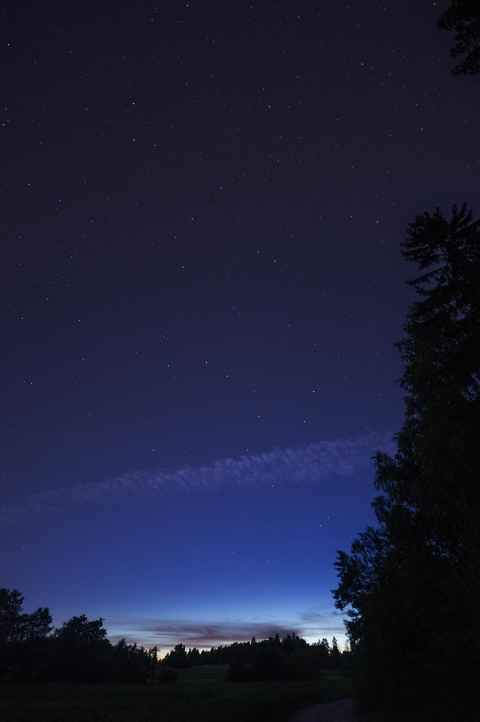
1. Example
This is the photo I'll use as an example. It's not very remarkable, but it has stars and it has haze, and that's all we need.
2. How To
We're going to create this stack of layers:
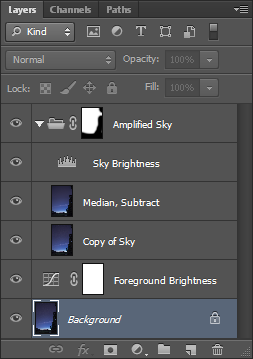
First, I make two copies of the background layer and put them in a layer group. Name them Median, Subtract and Copy of Sky
Create a Levels layer and put it on top of the two layers in the layer group. Name it Sky Brightness. Move the layer mask for the levels layer to the group.
Apply the Median filter to the Median, Subtract layer so that all stars disappear and you are left with nothing but haze. Then set its blend mode to Subtract.
Adjust the opacity of the Median, Subtract layer until you think you've separated the stars from the sky.
Adjust the overall sky brightness with the Sky Brightness layer.
Edit the layer group mask so that it excludes the foreground.
Add a Curves between the background layer and the layer group. Then adjust foreground brightness.
3. Before and After

OriginalProcessed
4. Constant Sky Brightness
If you don't want to darken the sky but just brighten the stars, you should set the white point of the Sky Brightness layer to the following values depending on the opacity of the Median, Subtract layer. Due to the effects of the subtract blend operation, these numbers may be off by a little. Experiment and trust your eyes.
text(white point) = 255 * (100-text(opacity)) / 100
| Opacity | Levels White Point |
|---|---|
| 5% | 242 |
| 10% | 230 |
| 20% | 204 |
| 25% | 191 |
| 33% | 171 |
| 50% | 128 |
| 66% | 87 |
| 75% | 64 |
| 80% | 51 |