How to remove hot pixel noise from images in Photoshop using a median-blurred copy of the image to interpolate the missing image data.
1. Image
We will use this photo, taken yesterday as an example:
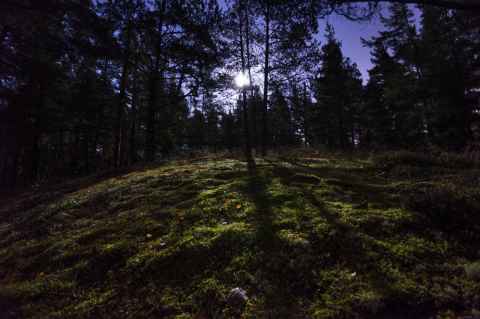
It was shot at ISO 400, 30 seconds exposure, on a Nikon D3200. In particular, we will concern ourselves with a small, dark area right of center:

2. Noise
Noise in digital photos come in different shapes. There's shot noise, which has to do with the quantum nature of light, and then there are various imperfections in the sensor. Some sensor elements may be stuck signaling maximum ("hot pixels"), and some elements may be broken so as to not sense any light at all ("dead pixels"). There is also charge leaking between elements, and thermal noise coming from the environment.
Bottom line is that you, the photographer, end up with stuff in your photo that you don't want.
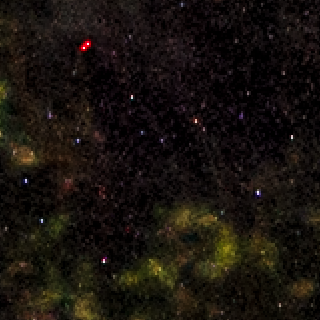
In this article, I describe a method to get rid of hot pixel noise. In this 200% magnification of the area of interest, we can see the noise clearly - there are two obvious red pixels top left, and a smattering of pixels that look out of place.
3. Dark and Light Frames
The good news is that the noise is a function of the sensor itself, the environment, and not of the image being registered. The surrounding temperature and current state of the sensor do play in, but whether we point the sensor straight into the moon, or somewhere else will not matter. It is therefore possible to take a picture in complete darkness and get the exact same noise pattern. Below is the original photo, and a photo that I took immediately after by putting the lens cap on, stuffing the camera into my camera bag, and doing the exact same exposure one more time. (The third image is the same as the second, just with brightness cranked up so you can see the shape of the noise.)
LightDarkDark (Amplified)
As you can see, the noisy pixels line up perfectly. Had I waited too long, or taken the sensor indoors and let it warm up, it may not have been so.
But now it does, and it suggests a way to get rid of the noise. If we have a photo that image and noise, and we know the noise, can't we just subtract the noise from the image and be done?
This is what is done very successfully in astrophotography and is called "dark frame subtraction". The proper image is called a "light frame" and the photo taken with the lens cap on is called the "dark frame".
4. Limitations of Dark Frame Subtraction
Dark frame subtraction is just that - you take the pixel value at the point in the noisy image, the value in the dark frame, and subtract the latter from the former. This works out approximately well when the sensor response is more or less linear, and when the background is black. If you have a "hot pixel", that always signals maximum brightness, you will of course end up with nothing after the subtraction.
5. Interpolating Away The Noise
What we will do is use the dark frame as a mask telling us which pixels need to be interpolated. The interpolation will be done by applying a median filter to the original image.
6. Procedure
I'm going to use Photoshop here. I'm sure this can be done in other applications.
6.1. Setting up the Workspace
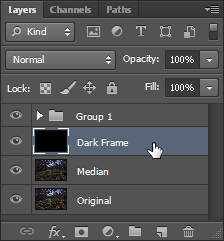
Start by opening the image and the dark frame. If you've shot them RAW, then you can tweak the image as you please in Camera RAW. I suspect you can do the same to the dark frame, although you shouldn't apply any noise reduction, of course. When you have opened the two files, setting up the layers as follows: At the bottom, the image with the noise ("light frame"). Duplicate that one, then put the dark frame on top.
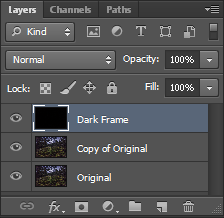
By toggling the dark frame layer, check alignment of the noise in the dark frame and the image. If the noise in the dark frame doesn't align with the noise in the light frame, then we will interpolate the wrong pixels.
LightDark
6.2. Creating the Interpolated Image
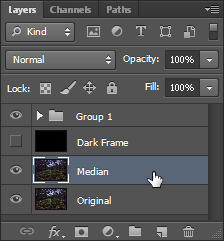
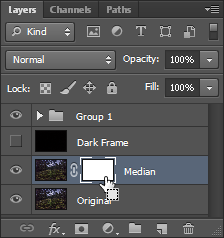
I've renamed the layer "Copy of Original" to "Median" here. Select the median layer:
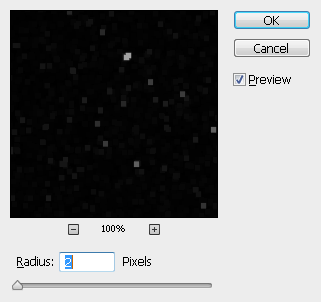
Select Median from the filter menu:
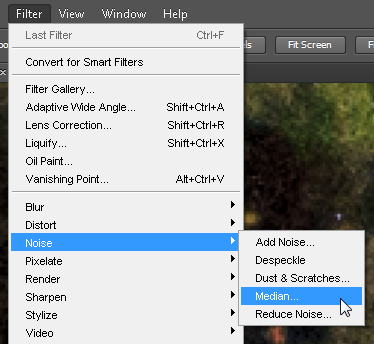
Select the smallest radius where the noise spots disappear into the blur. The smaller the value, the better the interpolation - but if you have clusters of noisy pixels you risk not getting rid of it all. I go for a radius of 10.
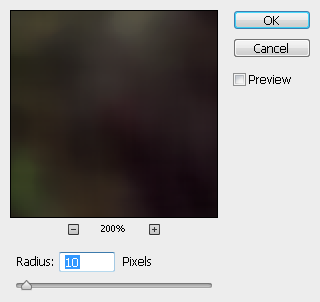
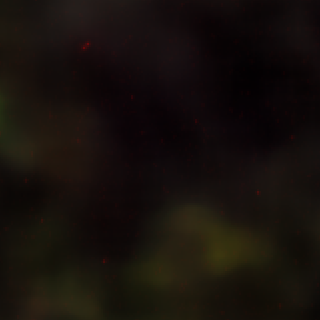
After applying, you should have a layer that is heavily blurred, but with no noise.
LightMedian
6.3. Masking the Interpolated Layer
Select the dark frame and hit Ctrl+A to select everything and Ctrl+C to copy.
Select the median layer again.
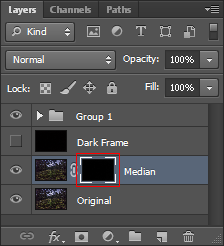
Add a layer mask to the median layer.
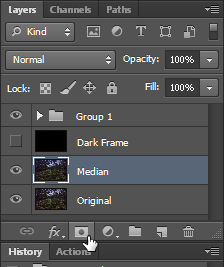
Select the median layer mask
Enter quick mask.

Paste the dark frame into the quick mask layer.

Invert it by pressing Ctrl+I, so we mask off the right pixels.
Then exit quick mask.

Invert the layer mask using the selection. Most of the layer mask should turn black, and the only non-transparent parts should be the noisy pixels.
In order to be certain of covering all the noise in the image, we will expand the mask a little. Select the Maximum filter from the filters menu.
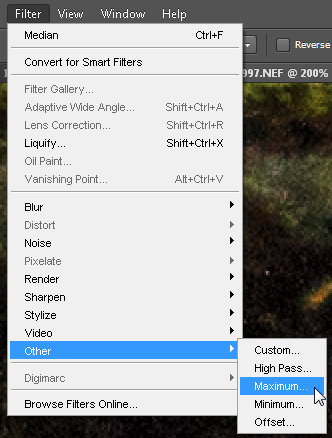
Apply a 2 pixel radius maximum. This is enough "margin" to ensure that we don't get "halos" around the noisy pixels, caused by the median layer's transparency falling off too near the center of the noise.
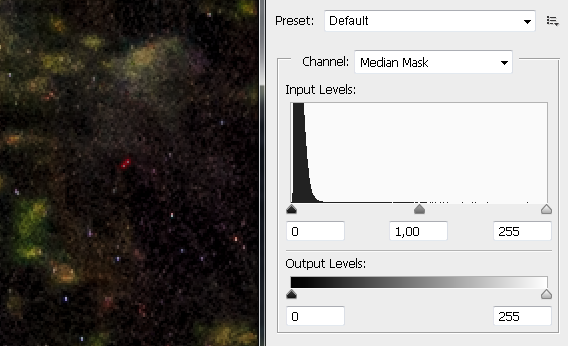
Enter levels, and adjust the white point (and the layer transparency with it) until the noise disappears.
StartFinal
7. Final Result
LightMedianMaskFinal