HDR Workflow
Sometimes the camera just won't fit the whole scene into the sensor's dynamic range. This is what I do then.
1. Capture
I usually end up doing HDR for one of two reasons:
Filling in shadows and highlights: A single exposure captures everything interesting, but I'd like some more shadow or highlight details. Basically, a single exposure would be fine, but a second shot, exposed for the shadows or highlights, would take it from good to great.
The interesting stuff has a wide dynamic range: I can't fit the interesting bits of the shot into the dynamic range of the camera. The subject is spread out over such a wide dynamic range that a single exposure won't work at all.
1.1. Fill
In this case, I do the best exposure I can, trying to capture as much of the interesting parts of the subject as I can. Then I increase or decrease exposure by 1⅔ EV and take the second exposure.
1.1.1. Case Study: St Othmar's Church
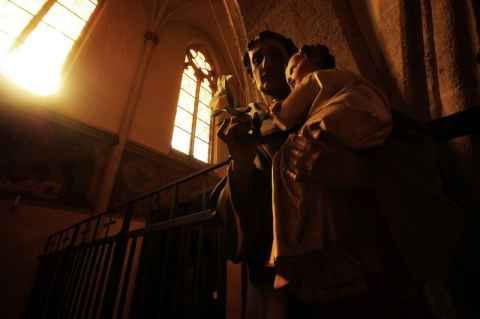
This is a statue in a church that I visited in Vienna about a month ago:


Zoomed in detail, just below the wrist of the statue.
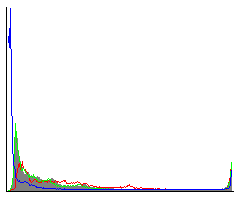
While the histogram shows that a lot of the image is in darkness, I think it looks just fine overall. Unlike the next case study, I'm not interested in actually showing the areas that are dark. I would, however, like to fill them out a little - just push the peak of the histogram a little bit to the right. The detail seen above is not quite black, and the noise isn't all that bad, but it's bad enough that it might be a problem if we consider postprocessing. This is when I do "HDR for filling". In this case I shot hand-held, as I hand't brought a tripod, and I figured I could make the shadows fit anyway.


Same region of the image as above, right below the wrist of the statue.
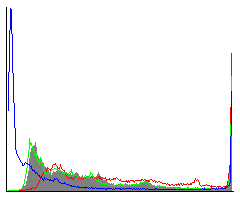
The peak is now a bit further away from the left. Not much, but enough that I no longer worry about shadow noise, or about those parts of the image falling apart in post-processing. After bringing both images into Photoshop and merging them I ended up with this image:
1.2. HDR Scene
I start by finding the shortest or longest exposure, depending on what is the easiest. Then I just keep adjusting the exposure up or down 1⅔ EV until I reach the other end of the exposure interval.
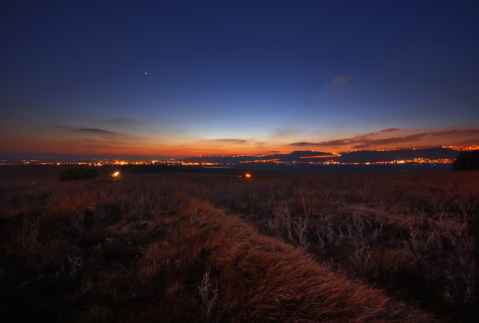
1.2.1. Case Study: Jezreel Valley
Nature photography in low light during the golden or blue hour often end up as HDR scenes. As an example, I'll use this photo of Jezreel Valley, Israel, that I shot back in 2010. The following is the best balanced exposure that I could get, along with its histogram:

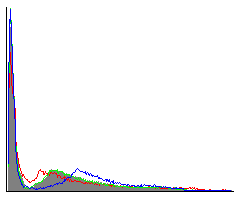
Just looking at the histogram we see that the exposure might be balanced, but it isn't good. Most of the histogram is way to the left, jammed tight against the left edge, meaning that I'm losing a lot of image data to total darkness. Despite this, the histogram reaches all the way to the right. Zooming in on the brightest and darkest spots, we can see that the whole lower part of the photo is basically not there, while I'm are still getting washed out colors from the brightest area:

A patch from about a quarter in from the left and three quarters down.

A patch taken from just above center.
I would like to expose even darker, in order to catch all the color by the horizon. This is when I resort to HDR. It's not about "filling in the shadows a little" - I need to bring the whole lower half of my photo out of solid black. I start by finding the proper exposure for the horizon, as sunsets tend to be over before you know it. Capturing the light at the horizon, therefore, is the most important thing. A little bit of experimentation gives me this:


Now I step through the exposures at (roughly) 1⅔ EV, until I reach the other end of the dyanmic range of the scene. In this case I ended up taking a total of three exposures. Each is shown here as a thumbnail of the out-of-camera JPEG, followed by its histogram and the same two patches as used above:


In the final exposure we can see that the histogram has "detached" from the left edge, leaving a little space to the left. This is when I stop increasing the exposure time.
Fusing these three exposures yields the following result (click for larger version):
Zooming in on the same patches as I've used before shows that the composite captures detail both in the brightest and darkest areas. The detail level of the dark area is of course much less than the bright area, but it is enough - the purpose in this case is not to show every region of the photo in full illumination, but to better approximate the scene as experienced.


2. Assembling the Shots
2.1. Fill
For the case when I only use the multiple exposures to fill in the shadows or highlights, I edit the photo as usual, and put the fill exposure in a separate layer group along with a curves adjustment layer to make it blend in. Then I just edit the photo as normal.
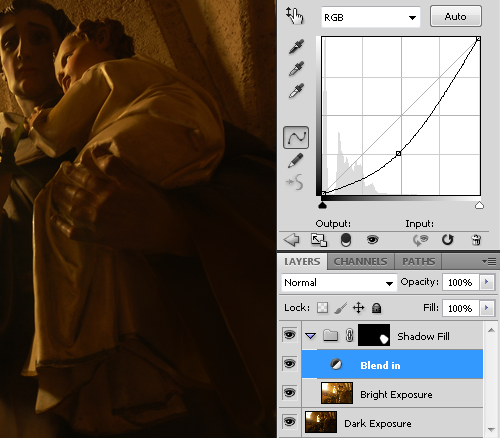
Note that the layer group has a mask attached to it, and that the blending mode is set to "Normal" - otherwise the Curves layer ("Blend in") would apply equally to all layers below it - including the layer whose luminosity we're trying to match!
2.2. HDR Scene
For the HDR scene, the workflow is a bit more complex. I start by using Photoshop's Merge to HDR Pro[a] feature. I merge them to a 16-bit image using the following settings:
16-bit output
Local Adaptation method
Edge Glow radius: 150px
Edge Glow strength: 0.2 or 0.8 - season to taste.
Exposure: This is a tricky one. I usually start off trying to place the brightest image at 0 EV, and then rely on being able to bring the whole image out of the shadows. That is, if the brightest image is at +X EV, I'll set exposure to -X EV.
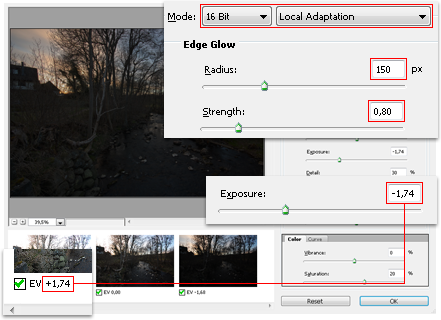
Note the setting of exposure to -1.74 as the brightest image is at +1.74 EV
These settings usually work, but not always. For example, sometimes they would end up with my setting the exposure to -8 EV or something crazy. Use these rules of thumb with common sense. Once I have the 16-bit image, I edit the photo as normal.