Optimal Crop of Rotated Photos
When taking photos where there is a very prominent vertical or horizontal feature, such as an unbroken horizon or tall, slim tower, it is important to hold the camera level if you wish to emphasize the horizontal-ness or vertical-ness in the composition. Unfortunately, we do not always have the time or possibility to make our cameras completely level using a spirit level or similar, nor do we always have the option of mounting the camera steady on a tripod. Sometimes the auto-focus points in the viewfinder can be used to align the camera, but it takes a very steady hand and a good portion of luck to get it precisely right. The end result: sloping lines that should be straight.
Film photographers have it easy, as they can just rotate the film - a lossless transformation, no less! But we digital people soon find that we have to do two things: First, figure out how much to rotate the photo, and then cut away the excess areas, returning the photo to rectangular again. The purpose of this algorithm and the associated application is to help with the second step.
Update 2010-09-11: I just found out that the Photoshop CS5 "Straighten" tool does the two steps for you. I don't know if it chooses the aspect ratio that results in the maximum area or if it preserves the aspect ratio of the original photo.
1. The Process
The process of rotating and cropping a photo is roughly this:
-
We start with a photo that needs straightening.

Grid rotated 12 degrees clockwise. -
Figure out how much the photo needs to be rotated.
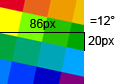
Grid rotated 12 degrees clockwise, with annotations. -
Apply the rotation.

Grid straightened, but with excess space. -
Inscribe a rectangle in the rotated photo and crop to it.

Straightened grid with crop shaded. 
Final result.
One this is immediately obvious: We cut away perfectly good image data in step 4. If we could somehow minimize the impact of this stage, then we'd be better off.
2. Algorithm
The problem boils down to finding an axis-parallell rectangle inscribed in another non-axis-parallell rotated rectangle. If we restrict ourselves to inscribed rectangles where two or more corners lie on an edge of the rotated rectangle, and where the two rectangle share the same centroid, the whole problem can be parameterized by the original image size, the rotation angle used for straightening, and the aspect ratio of the final result.
The original image size and the angle are fixed at the time when the photo is taken, so we don't have any choice there. But we can choose the aspect of the final image, and two choices stand out:
-
Use the same aspect as the original photo. That was the way we intended it to look when we pushed the shutter button, after all. This is a particular instance of having a fixed aspect ratio, and is the case we will discuss further below.
-
Use the aspect ratio where the area (in pixels) of the final image is maximized. This is really just the first option, wrapped in a local-maxima search algorithm. I have implemented it as a ternary search, where the parameter space is 0 < a < 90, and we use the aspect ratio cos(a):sin(a) in the probes.[1] The search algorithms should be self-explanatory from the source code and it will not be discussed further.
Once the aspect of the inscribed rectangle has been decided, we can imagine a small, axis-aligned rectangle growing inside a larger, rotated rectangle. As it grows, its corners trace out lines that sooner or later hit an edge of the larger rectangle. This gives us the idea for the algorithm: Take the lines traced by the corners of an imaginary, growing rectangle, and see where they intersect the edges of a rotated rectangle.
Once we have the intersection points, it is easy to just find the line that hit the edge closest to the origin and use the intersection point to create a rectangle. This is the largest inscribed rectangle with the given aspect ratio. Here is an animation that illustrates the solution[2]. The green ray intersects the top (green) edge of the rotated rectangle, and the blue one the side (blue) edge. In this particular instance, with a landscape-aspect rectangle, it is only the green edge and ray that determines the result. Had the rotating rectangle been in portrait aspect, it would have been the blue ray and edge that determined the solution. The parameters are: Original size 3008 x 2000 pixels (Nikon D40), angle goes from -89 to 90, and the aspect of the inscribed rectangle is 3:2.
3. Application
Here is the application. Due to symmetry (the problem is symmetric under 180 degree rotation), we only have to trace two lines through non-opposing corners of the growing rectangle. If your browser supports the canvas element, you'll see a small diagram illustrating the solution when you have pressed the "Go" button.