Cheap and Lean Timelapse Machine
I'm not prone to envy, but when it hits it hits with a vengeance. When I saw the work Tom does at timescapes.org[a], like this one[b], I couldn't help but think "I wish I could do that". Now, Tom has a (excluding lens) $2,719.99 Canon 5D Mark II DSLR[c] (a sweet imaging machine indeed) and an intervalometer. I have a $281.95 point-and-shoot Panasonic DMC-TZ7[d].
The question was then, how close to his masterpieces could I get with my TZ7? Because there is no way I'm getting a 5D2, nor hauling that thing around.
The biggest difference isn't between the 5D and the TZ7 - both are digital cameras, and while one is a DSLR and the other a point at shoot they basically do the same thing. The advantage Tom has is the intervalometer that triggers his camera's shutter at predefined points in time. My option would have been a stopwatch and my index finger - a process that is error-prone and quite frankly, as close to death by boredom as you can get. (Note: the Canon TC80N3 Timer Remote is $139.99, so the timer itself is cheap - the expense is in attaching a 5D to it.)
But the TZ7 has a HD movie mode and an "infinite burst" mode, where you can hold the shutter button down and the camera will keep shooting as fast as it can indefinitely. Those two together made up the solution: one for well-lit scenes, the other for poorly-lit ones.
First, let's just summarize the well-lit case: Film everything in HD using a low bitrate. Then speed everything up by averaging N input frames to 1 output frame. Done.
Darkness
The poorly-lit scenes called for something else. First I thought I could simply shoot these in movie mode and that the frame-averaging step would allow me to simply turn up the brightness of the movie in post-processing without introducing too much noise. This turned out to be false. In darkness the light level dropped beneath the noise threshold of the sensor, and the result was that there simply wasn't any image to brighten. (In movie mode, the sensor produces a sequence of 1/30s exposures and it is up to the amplifier to boost that image into something non-black.)
The next attempt was made by using the infinite burst mode.
The plan was the following:
-
The EXIF data gives a second-accurate time of the time the picture was taken. While we can subtract the time of the first image in the sequence from the time of the last image in the sequence, giving us the total time of the image sequence, the EXIF data is not good enough to accurately place all images along a time axis.
-
But the EXIF data also gives us the exact shutter time. Therefore, we can set up the equation:
(eq.1)Ttotal = Texposure + Trest
-
We now add up all the shutter times in all images, forming Texposure. Ttotal is simply the difference in time between the last and first image in the sequence.
-
We can now solve for Trest:
(eq.2)Trest = Ttotal - Texposure
-
What is Trest? Well, it is the time the camera spends writing the image to the memory card, refocusing, and all that. A reasonable assumption is that this time is constant, irrespective of what's in front of the camera. Given N being the number of images, we can therefore set the average time between shots, B, to:
(eq.3)B = Trest / N
-
Finally, we can iterate over the images in the order they were taken and produce a more accurate timestamp for all of them:
now = time of first image;
for each image i in the sequence
    set time of i to now
    add the exposure time of i to now
    add B to now
Which simply states that the time image
i + 1was shot is the time imageiwas shot, plus the exposure time ofi, plus the time it took the camera to writeito the memory card and get ready to shoot the next image. -
We now have a fairly accurate timeline that we, thanks to linear interpolation between adjacent images, can sample any way we want.
The result is below. It was shot in 16:9, 2MP, low image quality. Each shot was 1/3s @ f/3.3, ISO 80, halogen WB, but since the TZ7 re-computes exposure between images this would change over time if I, for example, shot a sunset. A total of 388 images were shot, totalling 165MB. The computed image timeline was resampled at 7.5fps and averaged 15:1 to produce a 60x timelapse (at 30fps).
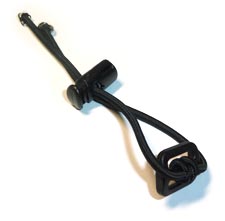
...and here is the intervalometer ($3 in total at Naturkompaniet[e] and Playground[f], sold as parts):
Summary
The example above is really not all that poorly lit. I was able to shoot it in ISO 80, which is the slowest setting on the TZ7, and still have only 1/3rd second exposures. I therefore suspect (but can't be bothered to verify) that I could have shot the above as a movie and then just used frame-averaging to reduce noise and speed it up. I think better examples of poorly-lit scenes would be when you have to shoot at about one second exposures at ISO 400 or ISO 800 - that is, about 30 times darker than the example. That's when the darkest areas really drop below the noise threshold of the sensor in movie mode.
Unfortunately there was nothing interesting like that within reasonable walking distance of me today.
Update 2010-07-10: The Making of "Sunset Over Jezreel Valley" article has some updates to the technique described here.